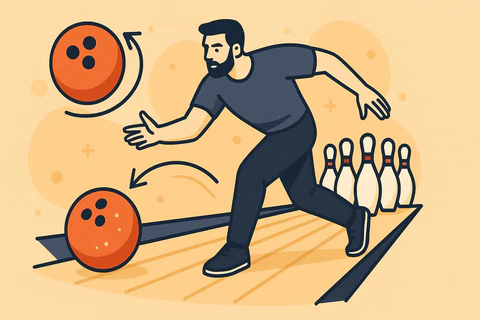
Bowling isn’t just about hurling a ball down a lane and hoping for the best. It’s a sport built on repetition, rhythm, and razor-sharp precision. The best bowlers in the world don’t just rely on instinct—they rely on structure. Every step, every swing, every release is calculated. And for those looking to level up their game, understanding the subtle cues built into the lane itself can be a game-changer.
Most casual bowlers are vaguely aware of the arrows on the lane. They’re the most visible guides, and many use them to aim. But there’s another set of markings that often go unnoticed—the approach dots. These small, seemingly insignificant dots on the approach area are some of the most powerful tools for building consistency and control in your game. They’re not flashy, but they’re foundational.
This guide breaks down exactly what these approach dots are, why they matter, and how you can use them to build a more repeatable, reliable approach. Whether you’re a weekend warrior or someone chasing a 200+ average, understanding how to use these dots can help you get there faster—and with fewer gutter balls along the way.
What Are Bowling Lane Approach Dots?
Before the ball even touches the lane, your approach sets the tone. And that’s where the approach dots come in. These dots are located on the wooden or synthetic floor just before the foul line—your runway, so to speak. They’re not just decorative. They’re there to help you line up, measure your steps, and repeat your delivery with precision.
There are typically two sets of approach dots on a standard bowling lane:
- 12-foot dots: Positioned approximately 12 feet from the foul line, these are the first set you’ll encounter as you walk toward the lane.
- 15-foot dots: Located about 15 feet from the foul line, these are closer to the ball return area and often used by bowlers with longer strides or unique footwork patterns.
Each set usually includes seven dots, spaced evenly across the width of the lane. The center dot aligns with the center board (board 20), and the others are spaced five boards apart. This layout mirrors the lane’s arrow pattern, making it easier to coordinate your foot placement with your target line.
Unlike the arrows that sit 12-15 feet down the lane and are used for targeting, the approach dots are all about setup. They’re the reference points for your feet, not your eyes. And while the exact appearance may vary slightly from one bowling center to another, the spacing and positioning are largely standardized across most modern alleys, thanks to regulations from organizations like the United States Bowling Congress (USBC).
The Purpose of Approach Dots in Bowling
Approach dots are like the unsung heroes of your pre-shot routine. They don’t get much attention, but they’re doing a lot of heavy lifting behind the scenes. Here’s what they’re really for:
Establishing a Consistent Starting Point
Consistency is everything in bowling. If your starting position shifts even slightly from shot to shot, your ball path—and your results—will too. The dots give you a fixed reference point to return to every time, helping you lock in a repeatable approach.
Foot Placement and Alignment
Whether you’re a right-hander or left-hander, stroker or cranker, your foot placement determines your angle of attack. The dots help you align your feet to the boards and arrows, ensuring your body is in the right position to execute the shot you want.
Supporting Your Pre-Shot Routine
Every serious bowler has a pre-shot routine. It’s not just superstition—it’s structure. Using the dots as part of that routine helps you mentally and physically prepare for each shot the same way, every time.
Building Muscle Memory
Over time, using the same dots to start your approach helps build muscle memory. Your body begins to internalize the motion, making your approach smoother and more automatic. That’s when you start to see real gains in consistency and control.
How to Use Approach Dots to Improve Your Game
Knowing what the dots are is one thing. Using them effectively? That’s where the magic happens. Here’s how to make them work for you.
Find Your Ideal Starting Dot
Your starting position depends on your bowling style. Strokers—those with a smooth, straight delivery—often start closer to the center. Crankers, who generate more revs and hook, may start farther left (for right-handers) to create room for the ball to arc. Tweeners fall somewhere in between.
Use the dots to experiment. Start with your slide foot (left foot for right-handers) on a specific dot and see how your ball reacts. Adjust as needed until you find a position that gives you a comfortable swing path and consistent ball reaction.
Adjust for Lane Conditions
Lane oil patterns change everything. On dry lanes, you might need to move your starting position right to avoid over-hooking. On oily lanes, shifting left can help you find more friction. The dots give you a clear, measurable way to make those adjustments without guessing.
Track Your Footwork
Ever feel like your steps are off? Use the dots to track your foot placement during your approach. Are you drifting left or right? Are your steps consistent in length? Video yourself and compare your foot positions to the dots. It’s a simple but powerful diagnostic tool.
Build a Repeatable Pre-Shot Routine
Pick a dot. Place your foot. Take your steps. Deliver. Repeat. Using the dots as part of your pre-shot ritual helps anchor your routine and keeps you grounded when the pressure’s on. It’s one less thing to think about when you’re lining up that crucial tenth-frame strike.
Make Lane Play Adjustments
As the game progresses and the oil breaks down, you’ll need to adjust. The dots let you move your feet left or right in small, controlled increments—usually one board at a time—so you can stay in the pocket without overcorrecting.
Approach Dots vs. Arrows: Knowing the Difference and When to Use Each
It’s easy to confuse the approach dots with the lane arrows, especially if you’re new to the sport. But they serve very different purposes.
Arrows Are for Targeting
The arrows, located about 12 to 15 feet down the lane, are your visual targets. You aim your shot toward a specific arrow to guide the ball’s path toward the pins. They’re about where your ball should first touch down after release.
Dots Are for Setup
The approach dots are all about your body—not the ball. They help you position your feet and align your stance before you even start your approach. Think of them as the foundation for everything that follows.
When to Focus on Each
During setup and practice, pay close attention to the dots. During your actual delivery, shift your focus to the arrows. Trying to look at both at the same time can lead to confusion and inconsistency.
One common mistake? Bowlers who adjust their foot placement based on where their ball hits the pins, rather than where it crosses the arrows. That’s like adjusting your aim based on where a dart lands on the wall behind the board. Use the arrows to guide your ball and the dots to guide your feet.
Customizing Your Approach Using the Dots
No two bowlers are built the same. Your height, arm length, stride, and release style all influence how you should use the approach dots. Here’s how to tailor them to your game.
Personalize Your Foot Placement
Taller bowlers may need to start farther back to accommodate longer strides. Bowlers with a high backswing might need to adjust their angle of approach. Use the dots to find a setup that feels natural and balanced for your body.
Try Footwork Drills
Set up drills where you start from the same dot every time and focus solely on your footwork. No ball. Just steps. This isolates your movement and helps you build muscle memory without the distraction of the throw.
Adjust for Different Shots
Spare shooting often requires a different angle than strike shots. Use the dots to shift your starting position accordingly. For example, when shooting a 10-pin (for right-handers), you might move several dots left to create a straighter angle.
Use Video for Feedback
Set up your phone or ask a friend to record your approach. Compare your foot placement to the dots and see if you’re drifting or inconsistent. Apps like Coach’s Eye or Kinovea can help you analyze your form in slow motion.
Common Mistakes Bowlers Make with Approach Dots
Even experienced bowlers can misuse or overlook the approach dots. Here are a few pitfalls to avoid:
Inconsistent Foot Placement
Changing your starting dot without realizing it can throw off your entire approach. Always double-check your setup before each shot.
Skipping the Routine
Rushing your setup or ignoring the dots when you’re in a hurry can lead to sloppy footwork and missed targets. Stick to your routine, even during practice.
Over-Adjusting
Moving several dots at once without understanding why can do more harm than good. Make small, deliberate changes and observe the results before adjusting again.
Relying Solely on the Dots
The dots are a tool—not the whole toolbox. Use them in conjunction with arrows, boards, and your own feel for the lane. No single marker tells the whole story.
Practice Tips for Mastering the Approach Dots
Like anything in bowling, mastering the approach dots takes practice. Here are a few ways to make them part of your training routine:
Warm-Up with Footwork Drills
Start each session with a few minutes of footwork-only drills. Focus on hitting the same dot with your slide foot every time. This builds consistency before you even pick up the ball.
Practice Without the Ball
Removing the ball from the equation lets you focus entirely on your steps. Walk through your approach using the dots as guides. Feel the rhythm. Then add the ball back in and see how it changes.
Use Tape or Temporary Markers
If your local alley allows it, place a small piece of removable tape near your starting dot during practice. It gives you a visual cue and helps you develop muscle memory faster.
Work with a Coach
A certified coach can help you analyze your approach and recommend dot placements that suit your style. Many coaches use video analysis to fine-tune footwork and alignment.
Why Approach Dots Deserve More Attention
They’re not flashy. They don’t get talked about much. But approach dots are one of the most underrated tools in a bowler’s arsenal. They offer structure, consistency, and clarity—three things every bowler needs more of.
Whether you’re chasing your first 200 game or trying to break into league play, integrating approach dots into your routine can help you get there. They’re not a shortcut. But they are a roadmap. And once you start using them with intention, you’ll wonder how you ever bowled without them.
Next time you lace up your shoes and step onto the approach, take a second to look down. Find your dot. Own your space. And watch your game start to click into place.
Frequently Asked Questions About Bowling Lane Dots
Are approach dots the same in every bowling alley?
Mostly, yes. While the exact appearance may vary slightly, the spacing and layout of the dots are standardized across most USBC-certified lanes.
Can I use approach dots for spare shooting?
Absolutely. Adjusting your starting dot is a great way to change your angle for spares, especially corner pins like the 7 or 10.
What if my feet don’t line up exactly with a dot?
No problem. Use the dots as general guides. If your ideal position falls between two dots, just remember your placement relative to them.
How do left-handed bowlers use the dots differently?
The concept is the same, but the alignment shifts to the left side of the approach. Lefties may favor different dots based on their angle and ball motion.


